SureCrete DK 400WB Water-Based Polyurethane Concrete Sealer


About
DK 400WB Polyurethane is a 57% solids, water-based polyurethane concrete sealer formulated for vertical or horizontal cementitious surfaces. While it's ideal for use in commercial and industrial applications, Surecrete DK 400WB is regularly used on residential concrete floors and overlays where superior appearance and performance are required.
This two-component system offers remarkable vapor permeability, which permits its use in specific exterior settings where the balance of UV stability, flexibility, chemical, and scratch resistance is important.
As a vertical wall coating, DK 400WB enhances anti-graffiti properties.
Surecrete DK 400WB is ideally suited for commercial, industrial, and residential settings: aircraft hangars, clean room floors, manufacturing facilities, warehouses, bars, clubs, retail stores, automotive showrooms, residential interiors, garage floors, stadiums, or any high traffic area where an exceedingly resilient floor is desired.
Calculator
How many square feet is your project?
NOTE: Coverages shown are based on an average coverage of 350 square feet per gallon per coat.
Specs
- For professional use
- Coverage: 300-400 sq. ft. /Gal
- VOC: 72 g/l
- Appearance (cured): clear gloss or satin sheen
- Appearance (wet): milky liquid
- Application Temperature: 50°F – 90°F (10°C - 32°C)
- Set to touch: 6-8 hours
- Ready for light traffic: 24 hours
- Full cure and hardness: 5 days
Instructions
SURFACE PREP
The principles for surface preparation for Dura-Kote Polyurethane WB are aligned with other coating systems placed on concrete or cement based overlays, the substrate must be:
- Clean: The surface must be free of dust, dirt, oil, grease, paints, glues, sealers, curing agents, efflorescence, chemical contaminants, rust, algae, mildew and other foreign matter that may serve as a bond breaker or prevent proper adhesion. To remove coatings, paint, sealers, glue from concrete, etc. best results are achieved through diamond grinding or shot blasting.
- Cured: Any concrete must be sufficiently cured to have complete hydration, approximately 28 days depending on temperatures & humidity. Cement based overlays typically cure sufficiently within 2 – 3 days.
- Sound: No system should be placed on flaking or spalling concrete or cement based overlay. If the surface is delaminating, or divots are present, diamond grinding, shot blasting, or other mechanical means should be used to remove the delaminating areas. Dependigivenng upon size of area, patching may be required prior to application of Dura-Kote Polyurethane WB. Flash Patch or Deep Level is an excellent choice as a patching product to complement the system. Refer to their respective spec. sheets.
As a thin mil coating, Dura-Kote Polyurethane WB, will never bridge construction joints in concrete. Large expansive slabs should have planned appropriate flexible caulks to allow for movement.
Cracks in concrete may likewise require treatment: evaluate crack as static or structural to set expectation of treatment. Refer to spec. sheet on SCT-22 Crack and Spall Treatment. - Profiled:
- Concrete: For a proper bond, the surface of concrete must be opened up or roughed up to feel like 80 – 180 grit sandpaper. This profile is best accomplished through diamond grinding or shot blasting. Proper profile should follow the standard established by the International Concrete Repair Institute (ICRI) Technical Guideline no. 03732 for Concrete Surface Profile (CSP). The established profile is categorized as CSP-1 or CSP-2. Customarily cement-based overlays do not require profiling. Exterior concrete must be previously coated prior to application of Dura-Kote Polyurethane WB.
- Finish or Top Coat:Screen the preceding coat with a 100 grit sanding screen on a rotational floor machine. This screening will ensure not only a good bond between coats, but also eliminate any debris or dust that may have settled onto the preceding coat as it was curing. Follow screening with vacuuming. Follow vacuuming with a micro-fiber wipe with a solvent such as, acetone, or denatured alcohol. Listed below are some common systems requiring a Finish or Top Coat:
- Dura-Kote Flakes
- Dura-Kote Metallics
- Dura-Kote Pigmented Epoxy 100
- Dura-Kote Pigmented Epoxy WB
- Any other Dura-Kote specialty system
- Limit Moisture & pH:Although Dura-Kote Polyurethane WB is vapor permeable, due to the uncertainty of vapor barriers placed beneath concrete, testing prior to application is appropriate.
- Plastic sheet test (ASTM-D-4263) can often identify excessive moisture vapor transmission. Tape all 4 sides of an 18” (45 cm) square of clear plastic to the slab and leave in place for 16 hours. Any condensation formed or darkening of the slab beneath the plastic may indicate the surface is too wet for polyurethane.
- Calcium Chloride test (ASTM-F-1869) will quantify the amount of moisture that is transmitted to surface of the slab. The moisture measurement is expressed in terms of pounds (kg) per 1,000 ft² (m²) per 24 hours. Measurements that are in excess of 8 pounds per 1,000 ft² (3.9 kg per 100 m²) over 24 hours are too wet for polyurethane. Follow directions of test kit manufacturer.
Note: these observations and measurements may be inherently flawed as they are “snapshots in time”. These tests serve only as guidelines.
TEMPERATURE/CURE
Avoid application on extremely cold or hot days or during wet, foggy weather. Basic rules include:
- Apply with ambient and surface temperatures ranging above 50°F (10°C) and below 90°F (32°C) and that will remain within ranges for at least 12 hours following application.
- Surface temperature must be a minimum 5°F (3°C) above dew point.
- Relative humidity should be below 75%.
Cure Rates @ 77°F (25°C) Cure Rates @ 50°F (10°C)
Dry to touch = 6 - 8 hrs. Dry to touch = 18+ hrs.
Light traffic = 24 hrs. Light traffic = 48 hrs.
Heavy traffic = 3 days Heavy traffic = 5 days
Full cure = 5 – 7 days Full cure = 14 days
APPLICATION
Planning
- Provide for ventilation so that vapors do not accumulate.
- Select appropriate PPE (personal protection equipment). Use of a NIOSH approved respirator is required. Refer to SDS.
- Work across the narrowest dimension of an area where practical.
- Work to an exit from wet product.
- Track coverage rate for each premeasured kit, after establishing room dimensions, before mixing commences, place a short piece of masking tape on the wall to correspond to the “distance” each kit should cover. Product should achieve approximately 300 - 400 ft² per gal. (28 - 37m² per 3.8 liter) 4 - 5.3 mils. Thin coats are desired.
Mask all areas requiring protection; product will stick to just about everything.
Mixing and handling:
- Organize mixing station that neither has to relocate, nor block the progress of application. Staging is critical so that Part A and part B are not confused with one another or mixed too far in advance. Once A and B are mixed, the catalyzed product should be placed on the floor within 30 minutes. If left in the pail too long, product will cure at an accelerated rate rendering it useless.
- Pour 1 part B into 3 parts A. Note that kits are premeasured for convenience.
- Mechanically mix (with Jiffy style mixer) both parts A and B for 3 minutes at medium speed.
- You may thin Dura-Kote Polyurethane WB after it has been catalized with water up to 20% (25oz per gallon). This step is optional, but makes the product more manageable, laying out a thinner coat. Some applicators will cut with water on the first coat only.
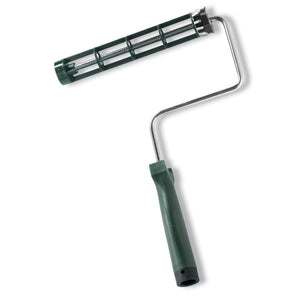
- Transfer contents into an appropriately sized pan or pail equipped with a roller grid.
- Do not leave pail upside down to drain onto floor. Any unmixed portion of A or B that may have accidentally been placed onto side of pail can now drain down onto the floor, creating a spot that will not cure.
- Clean out or replace mixing pails and mixer blades in a reasonable fashion, so that the chemistry of A and B remain consistent, especially over large projects.
First Coat
- Select applicator (product designed to be rolled, never atomize product through spraying)
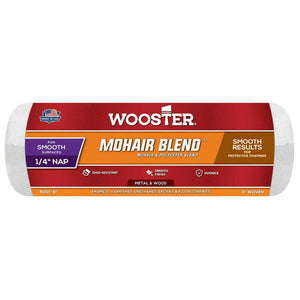
- As a thin mil system, most commonly a roller ranging in nap size from mohair to 3/8” (9.5 mm) is appropriate.
- Rollers should be premium quality with phenolic core.
- “De-fuzz” roller by wrapping tightly with masking tape and removing tape.
- Large areas may require 18” rollers and wider squeegees.
- Saturate roller in pan or pail with roller grid, and remove excess product to prevent excessive dripping. Any drips require rolling out.
- Apply product in an area that can comfortably be covered with the material on a wet roller. Before the roller begins to dry out, become tacky and “pull”, backroll the same area. Thin coats are imperative.
- Saturate roller again and cover another similar size area maintaining a wet edge between the two areas. Large expansive areas will require sufficient manpower and / or appropriately sized rollers to accomplish the wet edge. To illustrate: an area that has dried for 30 minutes will “pull” on the roller as wet product is applied next to it, leaving an unsatisfactory finish. Roller covers will require replacing if pulling or tackiness is observed. Areas of overlap must be wet on wet.
- Work in pairs. One man applies product over entire area as described above. Second man backrolls what has just been applied with a dry roller. Work around the project together.
- Cut in by brush areas adjacent to walls.
Note: First coat may “stand alone” as a single coat depending upon application selected, or applicator and client choice. First coat may also serve as Finish or Top Coat for several of Dura-Kote specialty systems, some are listed below:
- Dura-Kote Flakes
- Dura-Kote Metallics
- Dura-Kote Pigmented Epoxy 100
- Dura-Kote Pigmented Epoxy WB
- Any other Dura-Kote specialty system
Second Coat
If first coat has cured dry to the touch and is no longer tacky (refer to cure rates listed above as a guide) repeat all steps of application listed above. Planning, masking, mixing and handling, and application are identical in second coat.
If first coat has cured beyond 48 hours or if dust or debris has settled into it as it cured, it must be scuffed with a rotational floor machine equipped with a black pad or a 100 grit sanding screen. Follow scuffing screening with vacuuming. Follow vacuuming with a micro-fiber wipe with a solvent such as acetone, or denatured alcohol.
Sacrificial Coat
A sacrificial coat is not required, but will add further protection to the finished product. SureFinish provides a protective sacrificial coat, a measure of slip resistance, and is available in gloss and matte, as a simple mop on product.
See More