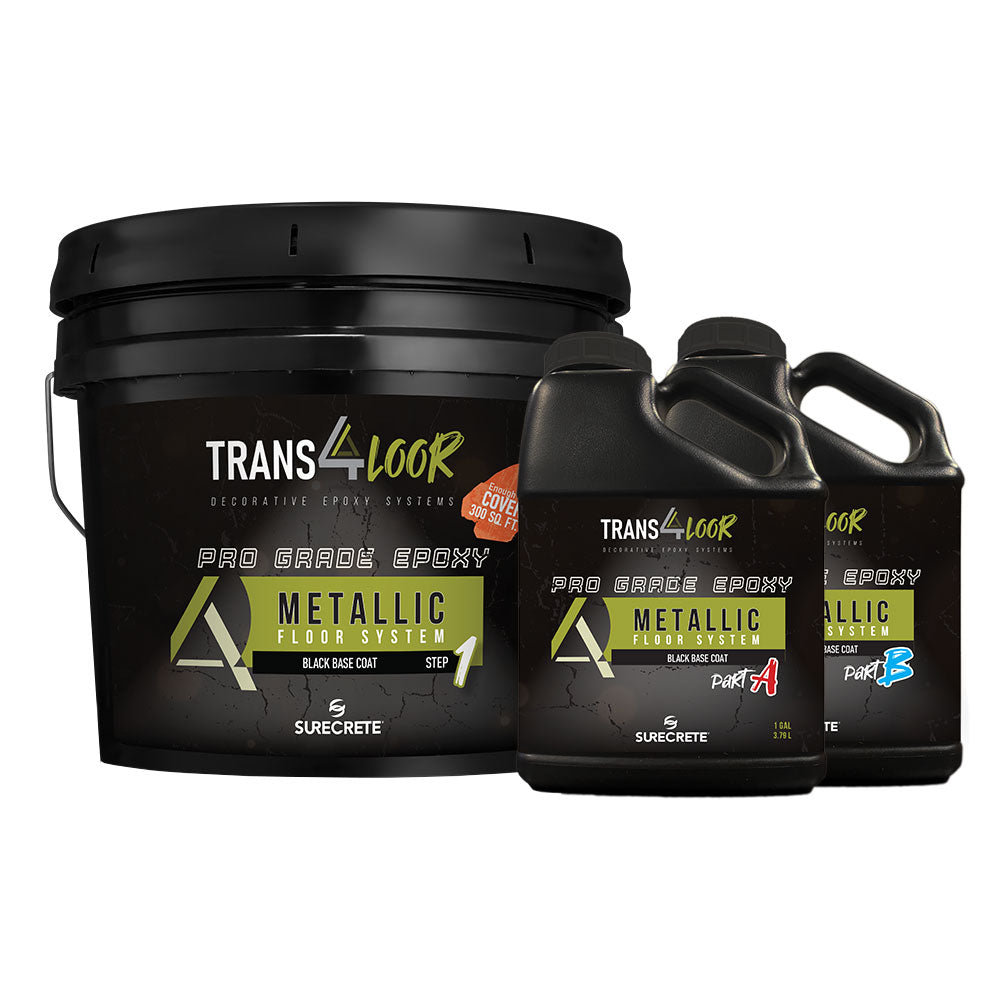
Order $24.50 or more to qualify for FREE Shipping on eligible items. (Contiguous 48)

TRANS4LOOR Black Floor and Countertop Epoxy 2-gallon


About

Trans4loor Black Epoxy is the base coat for Surecrete's Trans4loor Metallic Floor System, a two-component, solvent free, 100% solids epoxy/amine system. 

Purchase Trans4loor Metallic Floor System Step 2 here and metallic pigments here.

Calculator

Coverages are estimated on average coverages stated on TDS. Please see TDS for more details. 

Thickness 2 gal kits
1 coat

Specs

Coverage: Varies upon substrate, approximately 200-300 sq ft 

VOC Content: < 20 g/l 

  • Forms a tough, high strength coating that is resistant to abrasion from heavy traffic and is unaffected by rubber burns
  • Resistant to damage caused by exposure to alkalis, solvents, acids, salt solutions and water, fats, oils and fuels
  • Formulated with resins which work as an adhesive within the slab, strengthening it around minor cracks, crevices and weak spots

Instructions

PREPARATION: 

1. Clean: The surface must be free of dust, dirt, oil, grease, paints, glues, sealers, curing agents, stamp tool releases, efflorescence, chemical contaminants, rust, algae, mildew, and other foreign matter that may prevent proper adhesion.

2. Cured: Any concrete must be sufficiently cured to have complete hydration, approximately 28 days depending on temperature and humidity. 

3. Sound: No epoxy system should be placed on flaking or spalling concrete. If the surface is delaminating, or divots are present, then diamond grinding, shot blasting, or other mechanical means should be used to remove the delaminating areas. Depending upon size of area, patching may be required prior to application of the epoxy. Either Flash Patch or Deep Patch are an excellent choice as a patching product to complement the system. Refer to their respective TDS. Evaluate all cracks and determine if they are static or structural to set expectation of treatment. Refer to SCT-22 TDS. Construction Joints in concrete may have sufficient movement to “telegraph” through the Trans4loor epoxy. Large expansive slabs should have planned appropriate flexible caulks to allow for this movement and prevent bridging of Trans4loor epoxy across either side of the construction joint.

4. Profiled: 

  • Concrete: For a proper bond, the surface of concrete must be opened up or roughed up to feel like 80 – 180 grit sandpaper. This profile is best accomplished through diamond grinding or shot blasting. Proper profile should follow the standard established by the International Concrete Repair Institute (ICRI) Technical Guideline No. 03732 for Concrete Surface Profile (CSP). The established profile is categorized as CSP-2 or CSP-3. 
  • Finish or Top Coat: Screen the preceding coat with a 100 grit sanding screen on a rotational floor machine. This screening will ensure not only a good bond between coats, but also eliminate any debris or dust that may have settled onto the preceding coat as it was curing. Follow screening with vacuuming. Follow vacuuming with a microfiber wipe with a solvent such as xylene or acetone.

5. Limit Moisture: Since Trans4loor epoxy is not vapor permeable and due to the uncertainty of vapor barriers placed beneath concrete, testing prior to application is appropriate. 

  • Plastic sheet test (ASTM-D-4263) can often identify excessive moisture vapor transmission. Tape all four sides of an 18” (45 cm) square of clear plastic to the slab and leave in place for 16 hours. Any condensation formed or darkening of the slab beneath the plastic indicates the surface is too wet for an epoxy. 
  • Calcium Chloride test (ASTM-F-1869) will quantify the amount of moisture that is transmitted to surface of the slab. The moisture measurement is expressed in terms of pounds (kg) per 1,000 ft2 (m2) per 24 hours. Measurements that are in excess of 3 pounds per 1,000 ft2 (1.4 kg per 100 m2) over 24 hours are too wet for an epoxy. Follow directions of test kit manufacturer.  

MIXING AND APPLICATION: 

PLANNING

  • Select appropriate PPE (personal protection equipment). Provide adequate ventilation. Refer to SDS. 
  • Work across the narrowest dimension of an area where practical. 
  • Work to an exit from wet product. 
  • To track coverage rate for each 2-gallon kit, after establishing room dimensions, before mixing commences, place a short piece of masking tape on the wall to correspond to the distance one kit should cover. Product should cover as a clear coat: approximately 100 – 150 ft2 per gallon (10.7 – 16 mils) or as a thick build: 40– 50 ft2 per gallon (23—26 mils). 
  • Mask all areas requiring protection. Product will stick to just about everything.

MIXING AND HANDLING 

  • Organize mixing station that will not need to be relocated, and will not block the progress of application. Staging is critical so that Part A and part B are not confused with one another or mixed too far in advance. Once A and B are mixed, the catalyzed product should be placed on the floor immediately. If left in the pail too long, product will cure at an accelerated rate, rendering it useless. 
  • Pour 1 part B into 1 part A. Note that kits are premeasured for convenience. Exercise care to avoid pouring product down the sides of the pail, as this will be difficult to mix. 
  • Mechanically mix both parts A and B with “jiffy” style mixer blade for 3 minutes at medium speed. Jiffy style mixer at medium speed will help prevent air entrainment. 
  • Pour contents completely out in a fairly long trail for application. Any unused portion left in the pail can cure at an accelerated rate, rendering it useless. 
  • Do not leave the pail upside down to drain onto the floor. Any unmixed portion of A or B that may have accidentally been placed onto the side of pail can now drain down onto the floor, creating a spot that will not cure. 
  • Clean out or replace mixing pails, mixer blades, and roller covers in a reasonable fashion, so that the chemistry of A and B remain consistent, especially over large projects.

BASE COAT 

1. Spiked shoes are required throughout application. 

2. Select spreader 

  • For high build to cover small holes and imperfections in floor (e.g. blowouts from carpet tack strip), a notched squeegee or gauge rake may be appropriate. 
  • For a tighter coat, a squeegee or a roller ranging in nap size from mohair to 3/8” (9.5 mm) may be appropriate.
  • Rollers should be premium quality with phenolic core. 
  • “De-fuzz” roller by wrapping tightly with masking tape and removing tape. 
  • Large areas may require 18” (46 cm) rollers and wider squeegees.

3. Spread product evenly over area. Areas adjacent to walls may be “cut in” using a brush. 

4. Backrolling: After achieving the appropriate coverage, begin progressively backrolling Primer Coat. Roller covers will require replacing periodically to prevent catalyzed product from setting up on roller cover or contaminating more freshly placed material.

See More

TRANS4LOOR Black Floor and Countertop Epoxy 2-gallon

Quantity must be 1 or more
Regular price
$295.95
Sale price
$295.95

Trans4loor (aka Transfloor) Black FLoor and Countertop Epoxy is step 1 in Surecrete's premium 100% solids epoxy Trans4loor Metallic Floor System, designed specifically for maximum durability and chemical resistance in a metallic epoxy floor or countertop.


  • Easy, user-friendly roller application
  • Low maintenance, high-gloss finish is smooth, durable and easy to clean
  • Virtually odor-free during installation and curing
  • Ideal for concrete flooring and countertops in residential and commercial spaces

Attention: Material is considered hazmat, and cannot be shipped air.

About

Trans4loor Black Epoxy is the base coat for Surecrete's Trans4loor Metallic Floor System, a two-component, solvent free, 100% solids epoxy/amine system. 

Purchase Trans4loor Metallic Floor System Step 2 here and metallic pigments here.

Calculator

Coverages are estimated on average coverages stated on TDS. Please see TDS for more details. 

Thickness 2 gal kits
1 coat

Specs

Coverage: Varies upon substrate, approximately 200-300 sq ft 

VOC Content: < 20 g/l 

  • Forms a tough, high strength coating that is resistant to abrasion from heavy traffic and is unaffected by rubber burns
  • Resistant to damage caused by exposure to alkalis, solvents, acids, salt solutions and water, fats, oils and fuels
  • Formulated with resins which work as an adhesive within the slab, strengthening it around minor cracks, crevices and weak spots

Instructions

PREPARATION: 

1. Clean: The surface must be free of dust, dirt, oil, grease, paints, glues, sealers, curing agents, stamp tool releases, efflorescence, chemical contaminants, rust, algae, mildew, and other foreign matter that may prevent proper adhesion.

2. Cured: Any concrete must be sufficiently cured to have complete hydration, approximately 28 days depending on temperature and humidity. 

3. Sound: No epoxy system should be placed on flaking or spalling concrete. If the surface is delaminating, or divots are present, then diamond grinding, shot blasting, or other mechanical means should be used to remove the delaminating areas. Depending upon size of area, patching may be required prior to application of the epoxy. Either Flash Patch or Deep Patch are an excellent choice as a patching product to complement the system. Refer to their respective TDS. Evaluate all cracks and determine if they are static or structural to set expectation of treatment. Refer to SCT-22 TDS. Construction Joints in concrete may have sufficient movement to “telegraph” through the Trans4loor epoxy. Large expansive slabs should have planned appropriate flexible caulks to allow for this movement and prevent bridging of Trans4loor epoxy across either side of the construction joint.

4. Profiled: 

  • Concrete: For a proper bond, the surface of concrete must be opened up or roughed up to feel like 80 – 180 grit sandpaper. This profile is best accomplished through diamond grinding or shot blasting. Proper profile should follow the standard established by the International Concrete Repair Institute (ICRI) Technical Guideline No. 03732 for Concrete Surface Profile (CSP). The established profile is categorized as CSP-2 or CSP-3. 
  • Finish or Top Coat: Screen the preceding coat with a 100 grit sanding screen on a rotational floor machine. This screening will ensure not only a good bond between coats, but also eliminate any debris or dust that may have settled onto the preceding coat as it was curing. Follow screening with vacuuming. Follow vacuuming with a microfiber wipe with a solvent such as xylene or acetone.

5. Limit Moisture: Since Trans4loor epoxy is not vapor permeable and due to the uncertainty of vapor barriers placed beneath concrete, testing prior to application is appropriate. 

  • Plastic sheet test (ASTM-D-4263) can often identify excessive moisture vapor transmission. Tape all four sides of an 18” (45 cm) square of clear plastic to the slab and leave in place for 16 hours. Any condensation formed or darkening of the slab beneath the plastic indicates the surface is too wet for an epoxy. 
  • Calcium Chloride test (ASTM-F-1869) will quantify the amount of moisture that is transmitted to surface of the slab. The moisture measurement is expressed in terms of pounds (kg) per 1,000 ft2 (m2) per 24 hours. Measurements that are in excess of 3 pounds per 1,000 ft2 (1.4 kg per 100 m2) over 24 hours are too wet for an epoxy. Follow directions of test kit manufacturer.  

MIXING AND APPLICATION: 

PLANNING

  • Select appropriate PPE (personal protection equipment). Provide adequate ventilation. Refer to SDS. 
  • Work across the narrowest dimension of an area where practical. 
  • Work to an exit from wet product. 
  • To track coverage rate for each 2-gallon kit, after establishing room dimensions, before mixing commences, place a short piece of masking tape on the wall to correspond to the distance one kit should cover. Product should cover as a clear coat: approximately 100 – 150 ft2 per gallon (10.7 – 16 mils) or as a thick build: 40– 50 ft2 per gallon (23—26 mils). 
  • Mask all areas requiring protection. Product will stick to just about everything.

MIXING AND HANDLING 

  • Organize mixing station that will not need to be relocated, and will not block the progress of application. Staging is critical so that Part A and part B are not confused with one another or mixed too far in advance. Once A and B are mixed, the catalyzed product should be placed on the floor immediately. If left in the pail too long, product will cure at an accelerated rate, rendering it useless. 
  • Pour 1 part B into 1 part A. Note that kits are premeasured for convenience. Exercise care to avoid pouring product down the sides of the pail, as this will be difficult to mix. 
  • Mechanically mix both parts A and B with “jiffy” style mixer blade for 3 minutes at medium speed. Jiffy style mixer at medium speed will help prevent air entrainment. 
  • Pour contents completely out in a fairly long trail for application. Any unused portion left in the pail can cure at an accelerated rate, rendering it useless. 
  • Do not leave the pail upside down to drain onto the floor. Any unmixed portion of A or B that may have accidentally been placed onto the side of pail can now drain down onto the floor, creating a spot that will not cure. 
  • Clean out or replace mixing pails, mixer blades, and roller covers in a reasonable fashion, so that the chemistry of A and B remain consistent, especially over large projects.

BASE COAT 

1. Spiked shoes are required throughout application. 

2. Select spreader 

  • For high build to cover small holes and imperfections in floor (e.g. blowouts from carpet tack strip), a notched squeegee or gauge rake may be appropriate. 
  • For a tighter coat, a squeegee or a roller ranging in nap size from mohair to 3/8” (9.5 mm) may be appropriate.
  • Rollers should be premium quality with phenolic core. 
  • “De-fuzz” roller by wrapping tightly with masking tape and removing tape. 
  • Large areas may require 18” (46 cm) rollers and wider squeegees.

3. Spread product evenly over area. Areas adjacent to walls may be “cut in” using a brush. 

4. Backrolling: After achieving the appropriate coverage, begin progressively backrolling Primer Coat. Roller covers will require replacing periodically to prevent catalyzed product from setting up on roller cover or contaminating more freshly placed material.