SureCrete MicroTek One Coat Microcement Overlay for Concrete


About
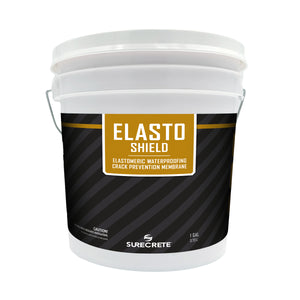
MicroTek One Coat is a professional-grade microcement overlay designed for interior and exterior walls, bathrooms, fireplace surrounds, and floors. Unlike standard overlays limited to concrete, MicroTek can be applied directly over drywall or cement board when primed with SureCrete ElastoShield, making it one of the most versatile wall finishing products available.
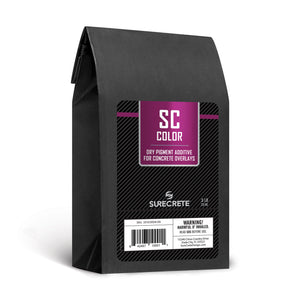
Available in Gray or White, the White base should be used if adding pigment with SC Color Packs or XS Color Packs for custom decorative finishes. Each 40 lb. bag provides 200–300 sq. ft. of coverage per coat (20 lb pail provides 100-150 sq ft per coat), depending on application technique and surface conditions.
Whether updating a bathroom, refinishing drywall, transforming interior or exterior walls, or creating a sleek fireplace surround, MicroTek One Coat delivers a durable and elegant microcement finish for both DIY and professional projects.
Calculator
How many square feet is your project?
*Note: Coverage rate varies based on substrate and application techniques
Specs
Where is Microtek One Coat Used?
MicroTek One Coat is used in a variety of interior and exterior spaces on walls, floors, and ceilings, including:
- Living Spaces
- Kitchens
- Bathrooms
- Patios
- Pool Decks
Product Specifications for MicroTek One Coat
| SPECIFICATION | DETAILS |
| Product Type | Microcement Microtopping |
| Package Size | 40 lb bag and 20 lb pail |
| Base Colors | White or Gray |
| Mixing | Single-component, add water only |
| 40 lb Bag - Water Required | 5 to 6 qt per bag |
| 20 lb Pail - Water Required | 2.5 to 3 qt per bag |
| 40 lb Bag Coverage | ~ 200-300 sq ft* per coat per 40 lb bag |
| 20 lb Pail Coverage | ~ 100-150 sq ft* per coat per 20 lb pail |
| Compressive Strength | ASTM C-109: 4,278 PSI @ 28 days |
| Flexural Strength | ASTM C-348: 995 PSI @ 28 days |
| Tensile Strength | ASTM C-190: 440 PSI @ 28 days |
| Abrasion Resistance | ASTM D-4060: 28 days %loss – 500 cycles – less than 0.50% |
| Mosaic Shear | ANSI A 118.4: 280 PSI @ 28 days |
| Applications | Interior & Exterior |
| Surface orientation | Horizontal & Vertical |
*Coverage varies depending on desired texture and application method
Instructions
Application Instruction Overview for MicroTek One Coat
IMPORTANT! Before You Begin: Review the complete MicroTek One Coat Technical Data Sheet (TDS) and Safety Data Sheet (SDS), linked above, before installation. These documents contain important information on surface preparation, mixing, application, curing, limitations, storage, handling, and safety requirements to help ensure a successful installation.
The information below is just a brief overview of the steps involved in applying MicroTek One Coat.
FOR APPLICATION ON WALLS
To see a full walkthrough of the products and techniques used for preparing, pigmenting, mixing, applying, and sealing MicroTek One Coat to walls, watch this bathroom makeover video created by SureCrete. There are many tips and tricks that are very helpful for a successful installation.
An overview on applying MicroTek to concrete floors is below the wall information.
STEP 1 — ENSURE THE CORRECT WORKING CONDITIONS
If your wall is textured, you may want a first coat of SureCrete WallSpray, which will help to even out the texture, which allows for an easier finish coat application.
The principles for surface preparation for Microtek are aligned with other cement-based overlays; the substrate must be:
- Clean: The surface must be free of dust, dirt, oil, grease, paints, glues, sealers, curing agents, efflorescence, chemical contaminants, rust, algae, mildew and other foreign matter that may serve as a bond breaker.
- Cured: Any concrete must be sufficiently cured to have sufficient hydration, approximately 7 - 14 days depending on temperatures and humidity
- Sound: No system should be placed upon a substrate that is flaking, spalling, or has hibernating spalling.
- Profile: Customarily profiling is not required for vertical application on a substrate. On concrete walls the use of SCR is recommended.
- Temperature/Dry/Cure:
- Air and substrate surface temperatures should remain between 50°F (10°C) and 90°F (32°C) during and within 48 hours of placement. Cooler conditions will take significantly longer to cure.
- This product (depending on weather conditions) should achieve initial set within 6 – 8 hours. Like concrete, full cure is reached at 28 days.
- Sealer selection for a finished Microtek project will require different cure times. Please refer to the sealer's TDS for information.
STEP 2 — PREPARE THE SURFACE
- Painted, drywall, and cement board surfaces require a full application of SureCrete Elastoshield Waterproofing Crack Prevention Membrane. This step will help the first coat adhere to the surface and help to prevent cracks on the finished surface.
- Allow to fully dry, which you can see because the color of the product changes from pink to red.
STEP 3 — MIXING
- Add water, approximately 5 qt. (4.7 liter) to a 5 gal. (18.9 liter) bucket. Use half this water for a 20 lb pail.
- Add 1 - SC Color Pack if desired. See Color Pack TDS. Use 1/2 bag by weight when mixing color for the 20 lb pail size. Caution: As with any pigments, pigment from Color Packs may streak, as color particulate is larger than aggregate of mix. To help minimize this risk, please ensure you have fully and aggressively mixed the pigment to break up pigment clumps.
- Mix using a handheld concrete mixer with an egg beater style mixing blade. Color Packs require comprehensive mixing in water prior to introduction of Microtek.
- Slowly introduce Microtek into the pail with mixer running.
- Scrape side of pail with a margin trowel to ensure all dry product is incorporated into the wet mix.
- Continue to mix for a minimum of 1 minute after all ingredients are combined to achieve a lump-free consistency.
- Additional water may be added up to 6 quarts (5.7 liters) total for 40 pound (18.1 kg) bag. Up to 3 quarts for 20 lb pail.
- Please note the exact amounts of water that you used. Differences in water levels used in different batches can lead to undesirable variations in finished color.
STEP 4 — APPLY THE BASE COAT
- Although the product name says One Coat, most successful installations are applied in two (or more) very thin coats, between 1/32" and 1/16".
- Please ensure SureCrete Elastoshield Waterproofing Crack Prevention Membrane has been applied to the wall and allowed to fully dry.
- Utilize a mud pan and taping knife and tightly coat the surface for the first coat. Watch the bathroom makeover video for an excellent demonstration of applying a base coat or MocroTek, WallSpray, or SureSpray.
- Allow to dry.
STEP 5 — APPLY THE FINISH COAT
- The first coat must set sufficiently to support finish coat, approximately 2-6 hours.
- Mix another batch of MicroTek using the same process used in step 3, taking special care to use the same water levels.
- As shown in the bathroom makeover video, it is helpful to use a spray bottle to lightly dampen the surface while applying new coats.
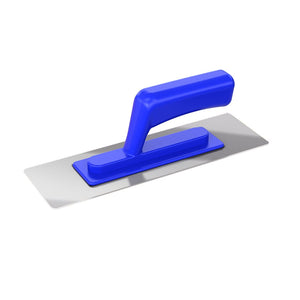
- Apply the finish coat with a trowel. Our DIY customers have reported the most success using a plastic or lexan plaster trowels. These trowels help limit burnishing on the finish. Alterations of trowel techniques will yield numerous pleasing finish coats.
STEP 6 — SEAL THE SURFACE
- Sealing helps to protect the surface from wear and stains, and is generally recommended in most spaces; bathrooms, kitchens, fireplace surrounds, countertops.
- Popular sealers for these projects include SureCrete XS-327 (Matte and Semi-Gloss), SureCrete DK 400WB (Satin and Gloss), and SureCrete Super WB (Low Luster and High-Gloss).
- Please refer to the sealer's TDS for curing times and more information.
STEP 7 — CLEAN UP
- Before Microtek dries; spills and tools can be cleaned up with water.
FOR APPLICATION ON CONCRETE FLOORS
Watch this video from Concrete Network to see a demonstration of this type of product being installed on a concrete floor. While it's not MicroTek One Coat being installed, there are many tips and tricks that are very helpful for a successful installation.
STEP 1 — PREPARE THE SURFACE AND ENSURE THE CORRECT WORKING CONDITIONS
The principles for surface preparation for Microtek are aligned with other cement-based overlays; the substrate must be:
- Clean: The surface must be free of dust, dirt, oil, grease, paints, glues, sealers, curing agents, efflorescence, chemical contaminants, rust, algae, mildew and other foreign matter that may serve as a bond breaker.
- Cured: Any concrete must be sufficiently cured to have sufficient hydration, approximately 7 – 14 days depending on temperatures and humidity
- Sound: No system should be placed upon a substrate that is flaking, spalling, or has hibernating spalling.
- Profile: Proper profile should follow the standard established by the International Concrete Repair Institute (ICRI) Technical Guideline no. 03732 for Concrete Surface Profile (CSP). The established profile is categorized as CSP-1 through CSP-3. The most common means to properly profile many concrete slabs is through the use of SCR (see SCR TDS). Some concrete slabs that are hard troweled or that are not sound may require more aggressive profiling achieved through diamond grinding or shot blasting. Customarily, profiling is not required for application over another cement-based overlay.
- Patching: Upon floor surface preparation, some areas may require patching prior to application of Microtek. Flash Patch is an excellent choice as a patching product to restore concrete to a sound state. Refer to Flash Patch TDS.
- Crack Treatment / Construction Joints on Floors: Cracks may require treatment. Refer to TK 9030 Epoxy Crack Treatment TDS to evaluate crack as static or structural to set expectation of treatment. Never bridge Microtek across any joint in concrete. Construction Joints in concrete have sufficient movement to “telegraph” through Microtek applications. Large expansive slabs should have planned appropriate flexible caulks to allow for this movement.
- Temperature/Dry/Cure:
- Air and substrate surface temperatures should remain between 50°F (10°C) and 90°F (32°C) during and within 48 hours of placement. Cooler conditions will take significantly longer to cure.
- This product (depending on weather conditions) should achieve initial set within 6 – 8 hours. Like concrete, full cure is reached at 28 days.
- Sealer selection for a finished Microtek project will require different cure times. Please refer to the sealer's TDS for information.
STEP 2 — MIXING
- Add water, approximately 5 qt. (4.7 liter) to a 5 gal. (18.9 liter) bucket. Use half this water for a 20 lb pail.
- Add 1 - SC Color Pack if desired. See Color Pack TDS. Use 1/2 bag by weight when mixing color for the 20 lb pail size. Caution: As with any pigments, pigment from Color Packs may streak, as color particulate is larger than aggregate of mix. To help minimize this risk, please ensure you have fully and aggressively mixed the pigment to break up pigment clumps.
- Mix using a handheld concrete mixer with an egg beater style mixing blade. Color Packs require comprehensive mixing in water prior to introduction of Microtek.
- Slowly introduce Microtek into the pail with mixer running.
- Scrape side of pail with a margin trowel to ensure all dry product is incorporated into the wet mix.
- Continue to mix for a minimum of 1 minute after all ingredients are combined to achieve a lump-free consistency.
- Additional water may be added up to 6 quarts (5.7 liters) total for 40 pound (18.1 kg) bag. Up to 3 quarts for 20 lb pail.
- Please note the exact amounts of water that you used. Differences in water levels used in different batches can lead to undesirable variations in finished color.
STEP 3 — APPLY THE BASE COAT
- Although the product name says One Coat, most successful installations are applied in two (or more) very thin coats, between 1/32" and 1/16".
- The surface should be saturated, surface dry (SSD or damp, no puddles).
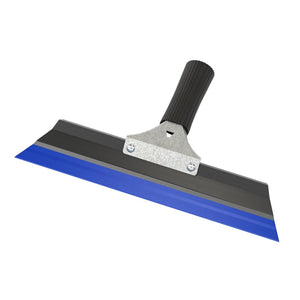
- Pour a generous ribbon of Microtek and tightly trowel or squeegee product over entire area. Many customers have success using a Bon Wizard Squeegee or Magic Trowel as shown in the video from Concrete Network linked above.
- Allow to dry.
STEP 4 — OPTIONAL — ADD STENCILS AND GROUT TAPE PATTERNS
- Stencils and tape patterns may be placed after scraping and sweeping of first coat, and prior to application of finish coat.
- Stencils and tape patterns may be removed as soon as the finish coat dries sufficiently to bear the foot traffic of the applicator, prior to sealing.
STEP 5 — APPLY THE FINISH COAT
- The first coat must set sufficiently to bear the foot traffic of the applicator, usually overnight (depending upon weather).
- Mix another batch of MicroTek using the same process used in step 2, taking special care to use the same water levels.
- The first coat may be scraped or sanded smooth and the surface swept or vacuumed. Ensure that the surface is completely clean of dust and debris.
- The finish coat applies as the first coat described above. Alterations of trowel techniques will yield numerous pleasing finish coats.
STEP 6 — OPTIONAL — STAIN THE SURFACE TO ADD DEPTH AND MOVEMENT
- Many customers choose to add SureCrete Eco-Stain Water-Based Concrete Stain at this point. It's available in 29 colors and 4 oz test samples are available to make sure you get the color you are looking for! Refer to Eco-Stain TDS for application instructions.
- Before secondary coloring, the finish coat must dry sufficiently to bear the foot traffic of the applicator, usually overnight (depending upon weather). Scrape the surface of finish coat with a floor scraper and remove any loose material.
STEP 7 — SEAL THE SURFACE
- To complete a Microtek project sealing is required.
- If secondary coloring is not utilized before sealing a floor, scrape the surface of finish coat with a scraper and remove any loose material.
- Excellent sealer choices for floor projects include SureCrete DK 400WB (Satin and Gloss) and SureCrete Super WB (Low Luster and High-Gloss). Please refer to the sealer's TDS for curing times and more information.
- For added slip resistance, you can add SureCrete SureGrip during the sealer mixing process.
STEP 8 — OPTIONAL — ADD SACRIFICIAL WAX
- Sealers protect the surface, but SureCrete SureFinish Sacrificial Wax (Matte and Gloss) protects and prolongs the life of your sealer.
STEP 9 — CLEAN UP
- Before Microtek dries; spills and tools can be cleaned up with water.