CX Pro-Formula All-Weather Concrete Countertop Mix
The same great mix you've loved and trusted since 2015 has a NEW look and label.


Outdoor kitchen concrete countertops in "Charcoal" by DC Custom Concrete

About
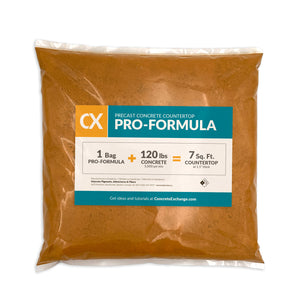
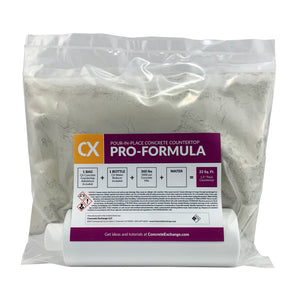
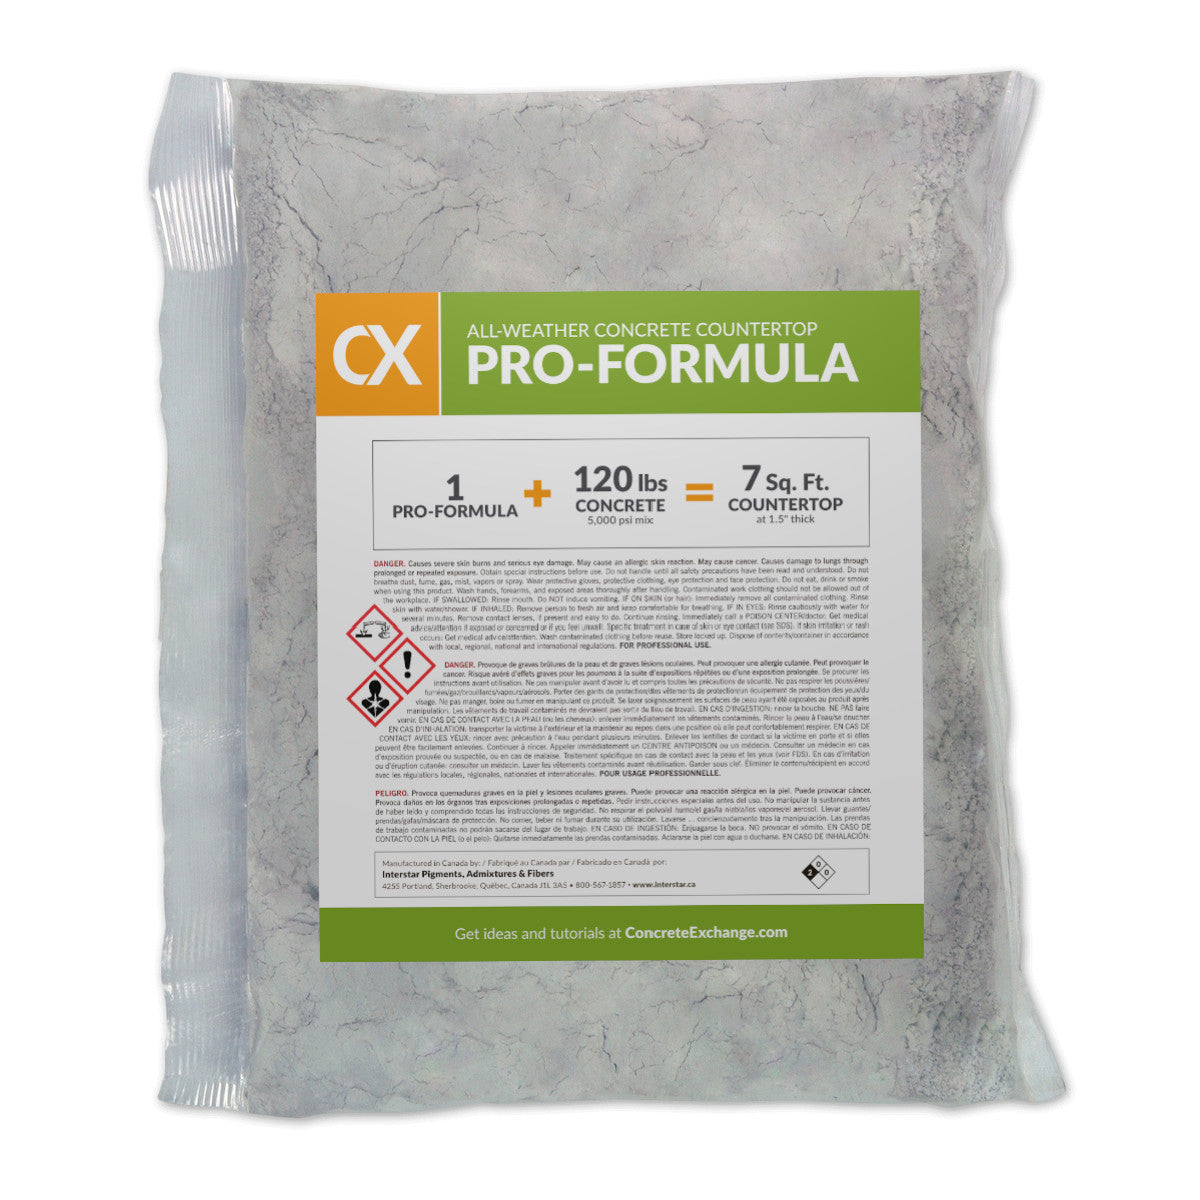
Formulated to stand-up against the elements, CX Pro-Formula All-Weather Concrete Countertop takes the guesswork out of measuring and mixing multiple ingredients to make precast outdoor concrete countertops. Just combine 1 bag of CX Pro-Formula All-Weather Concrete Countertop mix with 120 lbs of 5,000 PSI concrete to produce roughly 1 cubic foot (enough for 7 square feet at a 1-1/2 inch thickness). CX Pro-Formula All-Weather is formulated with fade-resistant pigments and freeze-thaw protection for use in the harshest environments.
Calculator
How many square feet is your countertop project?
Tip: multiply the length (in feet) by the width (in feet)
Specs
- Yields approximately 1 cubic foot (7 square feet at 1-1/2" thick)
- Blend with 120 lbs of 5,000 PSI Concrete Mix
- Ready to polish and seal in 5 Days (when cured at 80ºF)
- Individually packaged in easy-to-open heat-sealed bag
Instructions
Plan Your Project Before You Begin
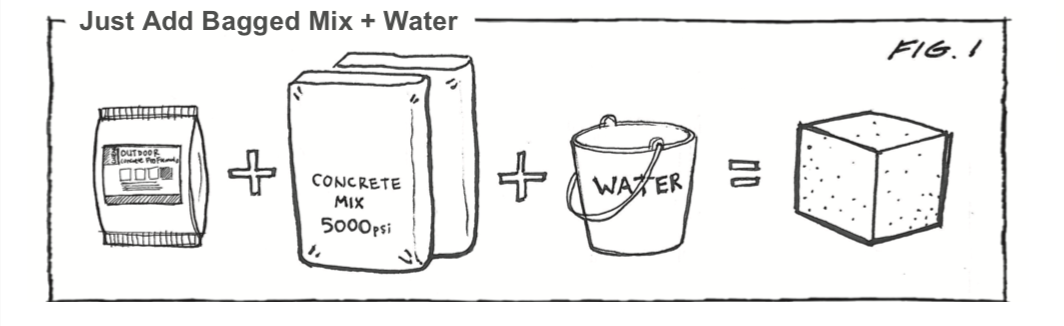
Each unit or (1) bag of CX Pro-Formula All-Weather Concrete Countertop requires 120 lb of 5,000 PSI concrete and water to yield 1 cubic foot of concrete (see Fig. 1 above). NOTE: CX Pro-Formula Concrete Countertop should NOT be used with concrete mixes that contain air entrainment admixtures or water-reducers. Concrete Exchange recommends, and strongly endorses, the use of Sakrete's 5000 Plus High Strength Concrete Mix.
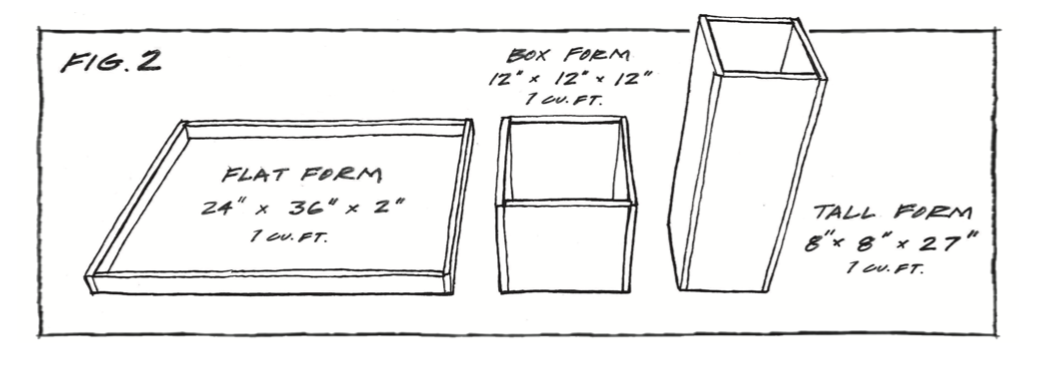
Mix Calculation. Determine the amount of material you’ll need by calculating the volume of your form, or mold, in cubic feet (see Fig. 2 above).
- Multiply: Length x Width x Depth of your form in inches
- Convert to Cubic Feet: Divide the total from step 1 above by 1,728 (the volume of one cubic foot) to calculate the total volume of your form in cubic feet.
- Allow extra for waste: Multiply the total from step 2 by 1.1 to allow 10% additional materials and avoid needing to scrape every last grain of sand from your mixer. (any un-needed concrete can be poured into a small mold for test polishing, staining, or sealing)
Temperature/Dry/Cure
The ambient temperature for mixing should be between 60° and 90°F (15°C and 32°C). Ideal Temperature is 75°F (24° C). Humidity should be greater than 25%.
The ambient temperature for curing should be between 65°F - 85°F (18°C - 29°C). Do not leave your filled form to cure in direct sunlight.
Low temp casting: Never cast concrete below 45° F (7°C). If casting in temperatures between 45°F and 70°F (7°C and 21°C), insulate castings after the concrete starts to harden with a layer of insulation (like furniture blankets) followed by painter's plastic. Concrete generates its own heat during the cure and capturing this heat with insulation will accelerate the curing process.
Mixing
Planning
- Depending on the size of your project, it's ideal to have two or three people assisting with the pour. Two people can work the concrete into the form while the third cleans the mixer and tools to keep things moving. Pro-Formula sets quickly, so it's important to plan ahead!
- A wheelbarrow can be used instead of a concrete mixer for projects 2 cu. ft. or less.
- If mixing more than 2 cu. ft. at a time, a larger mixer is recommended to allow for actual rather than nominal capacities.
- Check to ensure the inside of your form is clean.
- Keep your vibrator, screed board, and other tools close at hand.
Dry Mixing
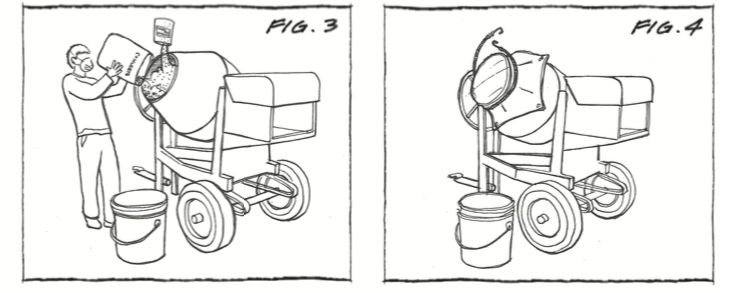
- Wear a dust mask and place the bagged concrete mix into the mixer followed by CX Pro-Formula All-Weather Concrete Countertop. (Fig. 3)
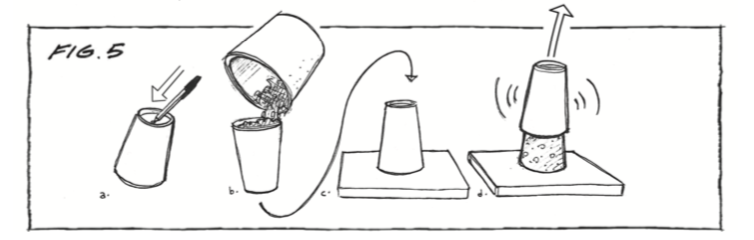
- Cover the mouth of the mixer with a plastic tarp and bungee cord or rope to prevent the dry materials from becoming airborne. (Fig. 4)
- Run the mixer for 3 minutes to tumble and blend the dry materials.
- Stop the mixer. Check the dry materials to ensure there are no clumps of unmixed materials. If the fibers or other materials are clumped, break them up with your gloved hands.
Creating a Workable Mix
- Start the mixer again and slowly add 1 gallon (3.8 L) of water per cu. ft. of mixture.
- Run the mixer for about 5 minutes and check the consistency of the mix. A "workable mix" looks and feels like thick, runny oatmeal. If necessary, slowly add more water in 1-cup increments. After each additional cup, let the mixer run about 2 minutes before adding another cup.
Slump Test Check
- When you achieved a workable mix (or "runny oatmeal"), turn the mixer off. A mix that is too dry creates air pockets and is hard to pour; a mix that is too wet is likely to be foamy and leads to excessive cracking.
- Slump Test: A simple method to check for a workable mix is to perform a basic slump test.
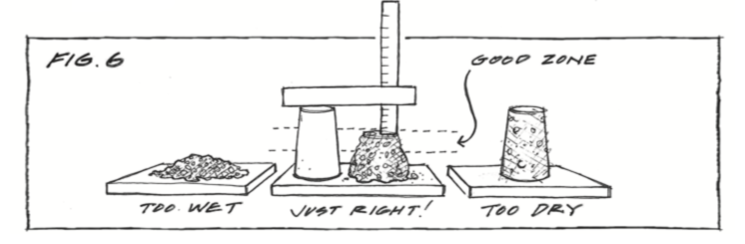
- Poke a ¼" hole in the bottom of a plastic cup, 15 oz (450 mL) or larger, to allow air to escape.
- Fill the cup with the freshly mixed concrete and pack it well.
- Place the filled cup upside-down on a flat, rigid surface.
- With your hands, carefully vibrate the cup in a steady lifting motion without stopping.
The slump is the vertical distance the concrete settles. The ideal slump of your "runny oatmeal" mix should be about half the height of the plastic cup. (see Fig. 5 above)
- Congratulations, you should now have a workable mix! If your mix is too dry, or stiff (Fig. 6), you need to slowly add small quantities of water by the cup while the mixer is on. If your mix is too wet (Fig. 6), you'll need to slowly add more bagged concrete mix by the cup. Take note of the exact amount of water required and keep using the same water ratio throughout the project for consistent results.
Resting and Moving the Mix
- Finally, turn the mixer off, letting the mixture "rest" for 5 minutes allowing the concrete to "temper".
- The mixture will stiffen a bit while resting.
- Turn the mixer back on for a final two minutes.
- Turn the mixer off and pour the mixture into a clean wheelbarrow.
Tips: Filling the Form
- Wear safety glasses, rubber gloves, and protective clothing to prevent wet concrete from coming in contact with your skin. Wet concrete is caustic and can cause skin irritations.
- Fill the form, or mold, until it is half full by working the material into the voids. Vibrate this first layer of the mixture for about 3 minutes by immersing the head of the vibrator horizontally into the mixture, or until the mixture flows evenly across the entire bottom of the mold. Be careful not to displace any decorative inlays you have placed in the form.
- Fill the rest of the form by working the material into voids and up to the top of the form. Vibrate the outside (sides and ends) of the form for about 5 minutes, or until only a few air bubbles are still rising to the surface. If needed, screed excess concrete off the top of the form with a clean, straight, piece of wood.
- After you fill and screed the form, cover (or tent) the form with painter's plastic to keep humidity in. Concrete needs moisture during the first four days of the cure process (particularly in hot weather climates).
Tips: Releasing From Form
- Allow 4 full days or more after the pour for the casting to cure, then release from the form.
- Remove all positioning screws that are used to fasten the form together as well as any screws used to secure it to the table or other support structure.
- Remove the walls of the form by gently prying hem away from the casting. Slow, constant pressure is the best way to remove the form walls. If using a prying tool, do not pry between the walls and concrete as this may chip the casting!
- To remove the bottom of the form, you'l need to turn the entire structure over. Carefully slide the casting to the edge of your casting table so that one-third of the casting hangs over the edge. Place strips of rigid foam across the surface of the table so for cushioning. Tilt the casting up on one side and carefully turn it over onto the foam strips. While turning your casting over, securely hold the casting itself, not the form, as it may release mid-air leaving he concrete casting to free fall.
- After releasing the casting from the form, consider doing a rough polish before the concrete fully cures and hardens (it's fully cure after 28 days).
- After the initial 6 days of curing, you can polish or grind the surface to achieve your desired finish.
Suitability Sample
Always prepare an adequate number of test samples for suitability for products’ intended use.
Disposal
Contact your local government household hazardous waste coordinator for information on disposal of unused product.
Full instructions See MoreCX Pro-Formula All-Weather Concrete Countertop Mix
 View Color Chart
Fade-resistant pigments and freeze-thaw protection are the superhero powers behind this CX Pro-Formula. Use it to precast outdoor kitchen countertops and furniture pieces wherever direct sunlight or extreme temps are present.
- Yields 7 square feet of countertop at 1-1/2" thickness
- Available in 8 UV resistant colors
- Perfect for outdoor kitchens, barbecues, and furniture
About
Formulated to stand-up against the elements, CX Pro-Formula All-Weather Concrete Countertop takes the guesswork out of measuring and mixing multiple ingredients to make precast outdoor concrete countertops. Just combine 1 bag of CX Pro-Formula All-Weather Concrete Countertop mix with 120 lbs of 5,000 PSI concrete to produce roughly 1 cubic foot (enough for 7 square feet at a 1-1/2 inch thickness). CX Pro-Formula All-Weather is formulated with fade-resistant pigments and freeze-thaw protection for use in the harshest environments.
Calculator
How many square feet is your countertop project?
Tip: multiply the length (in feet) by the width (in feet)
Specs
- Yields approximately 1 cubic foot (7 square feet at 1-1/2" thick)
- Blend with 120 lbs of 5,000 PSI Concrete Mix
- Ready to polish and seal in 5 Days (when cured at 80ºF)
- Individually packaged in easy-to-open heat-sealed bag
Instructions
Plan Your Project Before You Begin
Each unit or (1) bag of CX Pro-Formula All-Weather Concrete Countertop requires 120 lb of 5,000 PSI concrete and water to yield 1 cubic foot of concrete (see Fig. 1 above). NOTE: CX Pro-Formula Concrete Countertop should NOT be used with concrete mixes that contain air entrainment admixtures or water-reducers. Concrete Exchange recommends, and strongly endorses, the use of Sakrete's 5000 Plus High Strength Concrete Mix.
Mix Calculation. Determine the amount of material you’ll need by calculating the volume of your form, or mold, in cubic feet (see Fig. 2 above).
- Multiply: Length x Width x Depth of your form in inches
- Convert to Cubic Feet: Divide the total from step 1 above by 1,728 (the volume of one cubic foot) to calculate the total volume of your form in cubic feet.
- Allow extra for waste: Multiply the total from step 2 by 1.1 to allow 10% additional materials and avoid needing to scrape every last grain of sand from your mixer. (any un-needed concrete can be poured into a small mold for test polishing, staining, or sealing)
Temperature/Dry/Cure
The ambient temperature for mixing should be between 60° and 90°F (15°C and 32°C). Ideal Temperature is 75°F (24° C). Humidity should be greater than 25%.
The ambient temperature for curing should be between 65°F - 85°F (18°C - 29°C). Do not leave your filled form to cure in direct sunlight.
Low temp casting: Never cast concrete below 45° F (7°C). If casting in temperatures between 45°F and 70°F (7°C and 21°C), insulate castings after the concrete starts to harden with a layer of insulation (like furniture blankets) followed by painter's plastic. Concrete generates its own heat during the cure and capturing this heat with insulation will accelerate the curing process.
Mixing
Planning
- Depending on the size of your project, it's ideal to have two or three people assisting with the pour. Two people can work the concrete into the form while the third cleans the mixer and tools to keep things moving. Pro-Formula sets quickly, so it's important to plan ahead!
- A wheelbarrow can be used instead of a concrete mixer for projects 2 cu. ft. or less.
- If mixing more than 2 cu. ft. at a time, a larger mixer is recommended to allow for actual rather than nominal capacities.
- Check to ensure the inside of your form is clean.
- Keep your vibrator, screed board, and other tools close at hand.
Dry Mixing
- Wear a dust mask and place the bagged concrete mix into the mixer followed by CX Pro-Formula All-Weather Concrete Countertop. (Fig. 3)
- Cover the mouth of the mixer with a plastic tarp and bungee cord or rope to prevent the dry materials from becoming airborne. (Fig. 4)
- Run the mixer for 3 minutes to tumble and blend the dry materials.
- Stop the mixer. Check the dry materials to ensure there are no clumps of unmixed materials. If the fibers or other materials are clumped, break them up with your gloved hands.
Creating a Workable Mix
- Start the mixer again and slowly add 1 gallon (3.8 L) of water per cu. ft. of mixture.
- Run the mixer for about 5 minutes and check the consistency of the mix. A "workable mix" looks and feels like thick, runny oatmeal. If necessary, slowly add more water in 1-cup increments. After each additional cup, let the mixer run about 2 minutes before adding another cup.
Slump Test Check
- When you achieved a workable mix (or "runny oatmeal"), turn the mixer off. A mix that is too dry creates air pockets and is hard to pour; a mix that is too wet is likely to be foamy and leads to excessive cracking.
- Slump Test: A simple method to check for a workable mix is to perform a basic slump test.
- Poke a ¼" hole in the bottom of a plastic cup, 15 oz (450 mL) or larger, to allow air to escape.
- Fill the cup with the freshly mixed concrete and pack it well.
- Place the filled cup upside-down on a flat, rigid surface.
- With your hands, carefully vibrate the cup in a steady lifting motion without stopping.
The slump is the vertical distance the concrete settles. The ideal slump of your "runny oatmeal" mix should be about half the height of the plastic cup. (see Fig. 5 above)
- Congratulations, you should now have a workable mix! If your mix is too dry, or stiff (Fig. 6), you need to slowly add small quantities of water by the cup while the mixer is on. If your mix is too wet (Fig. 6), you'll need to slowly add more bagged concrete mix by the cup. Take note of the exact amount of water required and keep using the same water ratio throughout the project for consistent results.
Resting and Moving the Mix
- Finally, turn the mixer off, letting the mixture "rest" for 5 minutes allowing the concrete to "temper".
- The mixture will stiffen a bit while resting.
- Turn the mixer back on for a final two minutes.
- Turn the mixer off and pour the mixture into a clean wheelbarrow.
Tips: Filling the Form
- Wear safety glasses, rubber gloves, and protective clothing to prevent wet concrete from coming in contact with your skin. Wet concrete is caustic and can cause skin irritations.
- Fill the form, or mold, until it is half full by working the material into the voids. Vibrate this first layer of the mixture for about 3 minutes by immersing the head of the vibrator horizontally into the mixture, or until the mixture flows evenly across the entire bottom of the mold. Be careful not to displace any decorative inlays you have placed in the form.
- Fill the rest of the form by working the material into voids and up to the top of the form. Vibrate the outside (sides and ends) of the form for about 5 minutes, or until only a few air bubbles are still rising to the surface. If needed, screed excess concrete off the top of the form with a clean, straight, piece of wood.
- After you fill and screed the form, cover (or tent) the form with painter's plastic to keep humidity in. Concrete needs moisture during the first four days of the cure process (particularly in hot weather climates).
Tips: Releasing From Form
- Allow 4 full days or more after the pour for the casting to cure, then release from the form.
- Remove all positioning screws that are used to fasten the form together as well as any screws used to secure it to the table or other support structure.
- Remove the walls of the form by gently prying hem away from the casting. Slow, constant pressure is the best way to remove the form walls. If using a prying tool, do not pry between the walls and concrete as this may chip the casting!
- To remove the bottom of the form, you'l need to turn the entire structure over. Carefully slide the casting to the edge of your casting table so that one-third of the casting hangs over the edge. Place strips of rigid foam across the surface of the table so for cushioning. Tilt the casting up on one side and carefully turn it over onto the foam strips. While turning your casting over, securely hold the casting itself, not the form, as it may release mid-air leaving he concrete casting to free fall.
- After releasing the casting from the form, consider doing a rough polish before the concrete fully cures and hardens (it's fully cure after 28 days).
- After the initial 6 days of curing, you can polish or grind the surface to achieve your desired finish.
Suitability Sample
Always prepare an adequate number of test samples for suitability for products’ intended use.
Disposal
Contact your local government household hazardous waste coordinator for information on disposal of unused product.
Full instructions